Alright! First sweet of the year :)
These little mice are inspired by the book
The Night Circus. Both in and out of the circus, whimsical and completely incredible foods abound. This seemed like a good entry project for me. These mice are basically a shaped cream truffle (although I also envision the book mice as being solid chocolate candies made with a shaped mold) and these could be made into just about anything with enough patience. That being said, mice are so cute!
proof:
For these mice you need:
black licorice (preferably rope style, but if you can't find it anywhere, like me, then painstakingly cut apart some regular licorice before you start anything else.)
sliced almonds
4 oz. milk or semi-sweet chocolate
4 Tbsp coconut cream (can be purchased on its own or its the hard creamy stuff on the top of a can of full fat coconut milk that has settled.)
1/4 tsp. vanilla
2 1/2 cups confectioners sugar plus a little
cocoa powder (or cinnamon)
The first step, as mentioned in the ingredients list, is to cut your licorice into 'tails'. Nice and simple if you have been able to find rope licorice. Not as easy with regular old twisted licorice:
I suggest a very sharp knife and try not to pull as you cut.
Next, chop up your chocolate, or skip this if you're using chips.
Next, measure out the coconut cream and set it aside. You'll want to have it handy once the chocolate melts.
Make sure you have a double boiler or a bowl that can take some heat and fits into the top of a saucepan. Melt the chocolate in the top of the double boiler with the water hot but not quite simmering. Do not let the water boil. This goes fast so pay attention to it and stir while it melts.
 |
| this already has the coconut cream in this picture. |
After the chocolate is melty, remove it from the heat and quickly stir in the coconut cream and the vanilla.
Gradually add in the confectioners sugar, mixing it into the chocolate.
Eventually it will form a stiff paste. On a wax papered surface, divide the chocolate paste into about 24 pieces, fewer if you want bigger mice.
Mix together about 2 Tablespoons of confectioners sugar and a teaspoon or so of baking cocoa powder (or sub cinnamon) and have ready on a flat surface or very shallow bowl.
This is the time when my special helper came in to assist me :) (therefore there are fewer pictures)
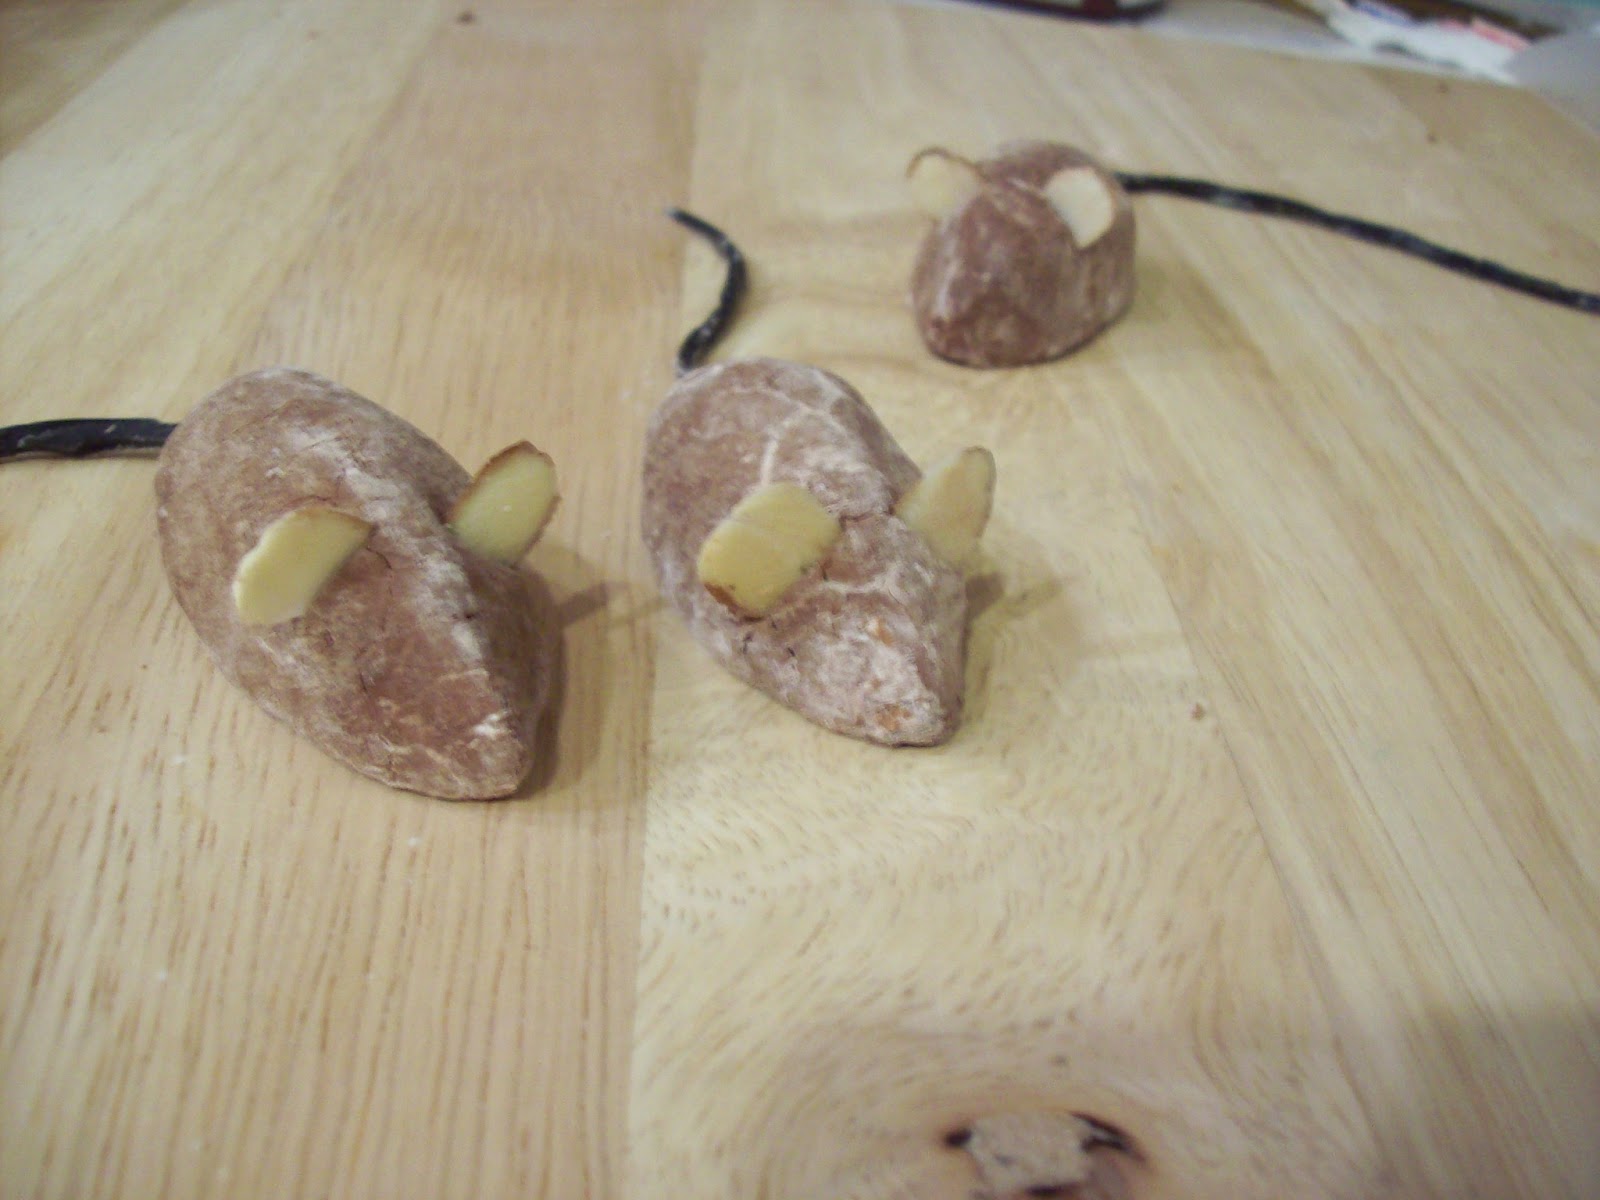
To shape the mice, take a piece of the chocolate paste and smush it up to get it soft. Wrap the chocolate around one end of a licorice tail and then use your palms to shape the mouse body. Roll the body in the cocoa powder mixture and rub it in with your fingers.
Next, find two pieces of almond that are similar in size and shape and poke them in for ears.
And voila! You have little mice. Keep going, and if you get tired of mice making, you can always just make little round ball truffles.
Happy Baking!
Also, totally toddler approved.